
Using Maya Per Particle Attribute scripting to transfer colors from images is not as hard as it seems. This technique allows a user to apply color patterns from an image library hidden from the rendering scene. The PerParticle attribute for RBG color is the focus of this article.
First off, you’ll need a little background in MEL coding, the Dynamics WB, and hardware rendering. There are dozens of tutorials on how to use these tools, and if you are looking for a quick start on MEL, feel free to read YSYT.
When you make a particle object in Maya (regardless if it’s in MEL or just manually generated), you have several perParticle attributes that allow you to modify each node individually. If you just put a lambert on the entire particle assembly, it will be a uniform color. So we must use MEL scripting to make more advance coloring capabilities.
For this example, toss a simple particle emitter with a standard Omni directionality. Place an object as a target and keyframe it’s location to several places on the XY Plane. Lastly, make a geometric plane on the XY Plane and make a material on it with a mapped image file. Call this image file as “file1.” Hide file1.
Activate the perParticle attribute for colorRGB and velocity. Refer to the perParticle attribute section in the Maya documention if you don’t know how to do this. perParticle attributes are strange, and they require the user to set up the runtime expression manually.

MEL Scripting screen capture of color perparticle attributing, Nick Pisca 2009
Create a runtime expression on the particle emitter and place this code in it. This script is short and sweet. It does two things: keeps the location of the particles on the XY Plane, and also colors objects by the hidden “file1” object.
vector $CurPos = particleShape1.position;
particleShape1.velocity = <<1,1,0>>;
float $VMag;
float $VE[] = `pointPosition nurbsSphere1.cv[1][1]`;
vector $VecPos = <<$VE[0],$VE[1],0>>;
vector $VDiff = $VecPos - $CurPos;
$VMag = mag($VDiff);             //Distance
vector $VecUnit = unit($VDiff);  //Unit (1) vector
vector $SpeedVec = ($VMag/2)*$VecUnit;
if ($VMag < 7) {
particleShape1.velocity = $SpeedVec;
}
if (($CurPos.x)<10 && ($CurPos.x)>0) {
if (($CurPos.y)<10 && ($CurPos.y)>0) {
float $PtInSpace[] = {($CurPos.x),($CurPos.y)};
float $RGB3[] = `colorAtPoint -o RGB -u ($PtInSpace[0]/10) -v ($PtInSpace[1]/10)  file1`;
vector $RGBvec = <<$RGB3[0],$RGB3[1],$RGB3[2]>>;
//float $RR = rand(0.0,1.0);
particleShape1.rgbPP = $RGBvec; //<<$RR,0,0>>;
};
};
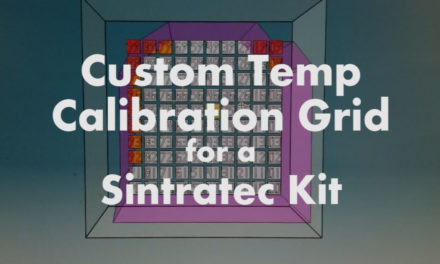
You may need to scaleXY the “file1” plane up or down according to your project scale. Or you can modify the code to accommodate the project size as well. I’m using a trick to get this to work: everything stays in 2D. A long time ago, I wrote a MEL script to do a real 3D-camera-orientation surface-point query of the RGB, but that was dramatically larger than this code. I’ll see if I can dig up that project because it lead to some crazy results. Here’s an image of an instance of the code:

Generative Scripting Capture by Nick Pisca.

few questions:
there is no runtime on the emitter just the particle shape node.
why is the code split into 3 bits above?
will this work with particle type spheres and rendered in mentalRay?
would love a sample scene file if possible.
thanks.
Rich,
The code is split up because of a flaw in my wordpress blog account. Just combine all three portions into one, and remove the “code” designations. I’ve changed the way my blog prints codes, and this script is affected strangely.
You are right about the particle shape node.
As for the particle types, unfortunately, we can”t use renderable output types with RGB perParticle attributes. It’s something that particle scripters have been asking for for years, but it’s not available. Another thing that would be great, is if AutoDesk would allow for variable shape and color instances on particles as well.
i wany 2 learn mel please tell how i will for it & please suggest some books Or video/dvd or mail addrsss
thank u
deepankar shome
Deepankar,
I teach MEL scripting, and I’ve been really disappointed at the current books and dvd’s out on the market. So I wrote my own MEL scripting book. Link: http://www.lulu.com/product/paperback/ysyt/4387353
I use it myself all the time. 🙂
Best -Nick